Spring Boot 商家登录系统实战
基于《Spring Boot 实用教程 第四版》郑阿奇主编案例实现
完整代码可复制,帮助快速实现课本案例
2.1开发经典案例
2.1.1从登录功能说起
1.创建数据库和表
创建数据库
1
2
3
| CREATE DATEABASE netshop
USE netshop
|
创建商家表
1
2
3
4
5
6
7
8
9
10
| CREATE TABLE `supplier` (
`SCode` char(8) NOT NULL COMMENT '商家编码',
`SPassWord` varchar(12) NOT NULL DEFAULT '888' COMMENT '商家密码',
`SName` varchar(16) NOT NULL COMMENT '商家名称',
`SWeixin` varchar(16) CHARACTER SET utf8mb4 COLLATE utf8mb4_0900_ai_ci NOT NULL COMMENT '微信',
`Tel` char(13) DEFAULT NULL COMMENT '电话',
`Evaluate` float(4,2) DEFAULT '0.00' COMMENT '商家综合评价',
`SLicence` mediumblob COMMENT '营业执照图片',
PRIMARY KEY (`SCode`)
) ENGINE=InnoDB DEFAULT CHARSET=utf8mb4 COLLATE=utf8mb4_0900_ai_ci
|
插入测试数据
1
2
| INSERT INTO `supplier` VALUES
('SXLC001A', '888', '陕西洛川苹果有限公司', '8123456-aa.com', '0911-812345X', 0.00, NULL);
|
2.创建spring boot项目
创建项目时选用依赖:
1
2
3
4
| "Developer Tools"中选中Lombok,Spring Boot DevTools.
"Web":Spring web
"Template Engines":Thymeleaf"
"SQL":MySQL Driver
|
3配置数据库连接
在application.properties中配置数据库连接信息
1
2
3
4
5
| spring.datasource.url=jdbc:mysql:
spring.datasource.username=root
spring.datasource.password=123456
spring.datasource.driver-class-name=com.mysql.cj.jdbc.Driver
spring.jackson.serialization.indent-output=true
|
2.1.2分层设计
1.持久层开发
在ser/main/java/com/example/mystore下新建package repository。
1.创建SupRepository接口
1
2
3
4
5
| package com.example.mystore.repository;
import com.example.mystore.entity.Supplier;
public interface SupRepository {
public Supplier findSuppLier(Supplier supplier);
}
|
2.创建SupRepositoryImpl类
1
2
3
4
5
6
7
8
9
10
11
12
13
14
15
16
17
18
19
20
21
22
23
24
25
26
27
28
29
| package com.example.mystore.repository;
import com.example.mystore.entity.Supplier;
import org.springframework.beans.factory.annotation.Autowired;
import org.springframework.jdbc.core.BeanPropertyRowMapper;
import org.springframework.jdbc.core.JdbcTemplate;
import org.springframework.jdbc.core.RowMapper;
import org.springframework.stereotype.Repository;
@Repository
public class SupRepositoryImpl implements SupRepository{
@Autowired
private JdbcTemplate jdbcTemplate;
@Override
public Supplier findSuppLier(Supplier supplier) {
try {
String sql = "SELECT * FROM supplier WHERE SCode = ?";
Object args[] = {
supplier.getScode()
};
RowMapper<Supplier> rowMapper = new BeanPropertyRowMapper<Supplier>(Supplier.class);
Supplier supObj = jdbcTemplate.queryForObject(sql,args,rowMapper);
return supObj;
}catch (Exception e){
return null;
}
}
}
|
2.业务层开发
1.设计响应实体类Result
在com.example.mystore下新建package core,在其中定义Result类
1
2
3
4
5
6
7
8
9
10
11
12
13
14
15
16
17
18
19
20
21
22
23
24
25
26
27
28
29
30
31
32
33
34
35
36
37
38
39
40
41
42
43
44
45
46
47
48
49
50
51
52
53
54
55
56
57
| package com.example.mystore.core;
public class Result {
private int code;
private String msg;
private Object data;
public int getCode() {
return code;
}
public void setCode(int code) {
this.code = code;
}
public String getMsg() {
return msg;
}
public void setMsg(String msg) {
this.msg = msg;
}
public Object getData() {
return data;
}
public void setData(Object data) {
this.data = data;
}
}
|
2.定义业务接口
在com.example.mystore下新建package service,在其中定义SupService接口
1
2
3
4
5
6
7
8
| package com.example.mystore.service;
import com.example.mystore.core.Result;
import com.example.mystore.entity.Supplier;
public interface SupService {
public Result checkSupplier(Supplier supplier);
}
|
3.定义业务实现类SupServiceImpl
1
2
3
4
5
6
7
8
9
10
11
12
13
14
15
16
17
18
19
20
21
22
23
24
25
26
27
28
29
30
31
32
| package com.example.mystore.service;
import com.example.mystore.core.Result;
import com.example.mystore.entity.Supplier;
import com.example.mystore.repository.SupRepository;
import org.springframework.beans.factory.annotation.Autowired;
import org.springframework.stereotype.Service;
@Service
public class SupServiceImpl implements SupService{
@Autowired
private SupRepository supRepository;
@Override
public Result checkSupplier(Supplier supplier) {
Supplier supObj = supRepository.findSuppLier(supplier);
Result result = new Result();
if(supObj == null){
result.setCode(404);
result.setMsg("用户不存在");
}else {
if (!supplier.getSpassword().equals(supObj.getSpassword())){
result.setCode(403);
result.setMsg("密码错");
}else {
result.setCode(200);
result.setMsg("验证通过");
result.setData(supObj);
}
}
return result;
}
}
|
3.表示层开发
1.设计模型
在com.example.mystore下新建package entity,在其中定义Supplier类
1
2
3
4
5
6
7
8
9
10
11
| package com.example.mystore.entity;
import lombok.Data;
@Data
public class Supplier {
private String scode;
private String spassword;
private String sname;
private String sweixin;
private String tel;
private String evaluate;
}
|
2,设计前端页面
在src/main/resources/templates下新建index.html和home.html
index.html:
1
2
3
4
5
6
7
8
9
10
11
12
13
14
15
16
17
18
19
20
21
22
23
24
25
26
27
28
29
30
31
32
33
34
35
36
37
38
39
40
41
| <!DOCTYPE html>
<html lang="en"xmlns:th="http://www.thymeleaf.org">
<head>
<meta charset="UTF-8">
<style>
.mytd{
width: 80px;
font-size: xx-small;
color: red;
}
</style>
<title>商品信息管理系统</title>
</head>
<body bgcolor="#e0ffff">
<br>
<div style="text-align:center">
<form action="/check" method="post">
<table style="text-align: center;margin: auto">
<caption><h4>商家登录 </h4></caption>
<tr>
<td>用 户 </td>
<td><input th:type="text" name="scode" size="16" th:value="${scode}"></td>
<td class="mytd"><span th:if="${result.getCode() == 404}" th:text="${result.getMsg()}"></span></td>
</tr>
<tr>
<td>密 码 </td>
<td><input th:type="password" name="spassword" size="16" th:value="${spassword}"></td>
<td class="mytd">
<span th:if="${result.getCode() == 403}" th:text="${result.getMsg()}"></span>
</td>
</tr>
</table>
<br>
<input th:type="submit" value="登录">
<input th:type="reset" value="重置">
</form>
</div>
</body>
</html>
|
home.html:
1
2
3
4
5
6
7
8
9
10
11
12
13
14
15
16
17
18
19
20
21
22
23
24
25
26
| <!DOCTYPE html>
<html lang="en"xmlns:th="http://www.thymeleaf.org">
<head>
<meta charset="UTF-8">
<style>
.mydiv{
margin: auto;
width: 350px;
text-align: left;
}
</style>
<title>商品信息管理系统</title>
</head>
<body bgcolor="#e0ffff">
<br>
<div style="text-align: center">
<h4 style="display: inline">用户 </h4><span th:text = "${scode}"></span>
<h3>您好!欢迎使用商品信息管理系统</h3>
<div th:text="您在本站的注册信息如下" class="mydiv" style="height: 30px"></div>
<div th:text="'商家:'+${sname}" class="mydiv"></div>
<div th:text="'微信:'+${sweixin}" class="mydiv"></div>
<div th:text="'电话:'+${tel}" class="mydiv"></div>
</div>
</body>
</html>
|
4.控制层开发
在com.example.mystore下新建package controller,在其中定义SupController类
1
2
3
4
5
6
7
8
9
10
11
12
13
14
15
16
17
18
19
20
21
22
23
24
25
26
27
28
29
30
31
32
33
34
35
36
37
38
39
40
| package com.example.mystore.controller;
import org.springframework.ui.Model;
import com.example.mystore.core.Result;
import com.example.mystore.entity.Supplier;
import com.example.mystore.service.SupService;
import org.springframework.beans.factory.annotation.Autowired;
import org.springframework.stereotype.Controller;
import org.springframework.web.bind.annotation.GetMapping;
import org.springframework.web.bind.annotation.RequestMapping;
@Controller
public class SupController {
@Autowired
private SupService supService;
@GetMapping("/index")
public String init(Model model){
Result result = new Result();
result.setCode(100);
result.setMsg("初始状态");
model.addAttribute("result",result);
return "index";
}
@RequestMapping("/check")
public String loginCheck(Model model, Supplier supplier){
model.addAttribute("scode",supplier.getScode());
model.addAttribute("spassword",supplier.getSpassword());
Result result = supService.checkSupplier(supplier);
model.addAttribute("result",result);
if (result.getCode() == 200) {
Supplier supObj = (Supplier) result.getData();
model.addAttribute("sname", supObj.getSname());
model.addAttribute("sweixin", supObj.getSweixin());
model.addAttribute("tel", supObj.getTel());
return "home";
}else return "index";
}
}
|
5.运行测试
单击IDEA工具栏的启动按钮
访问https://localhost:8080/index
输入用户名 SXLC001A
和密码 888
运行结果:
登录界面: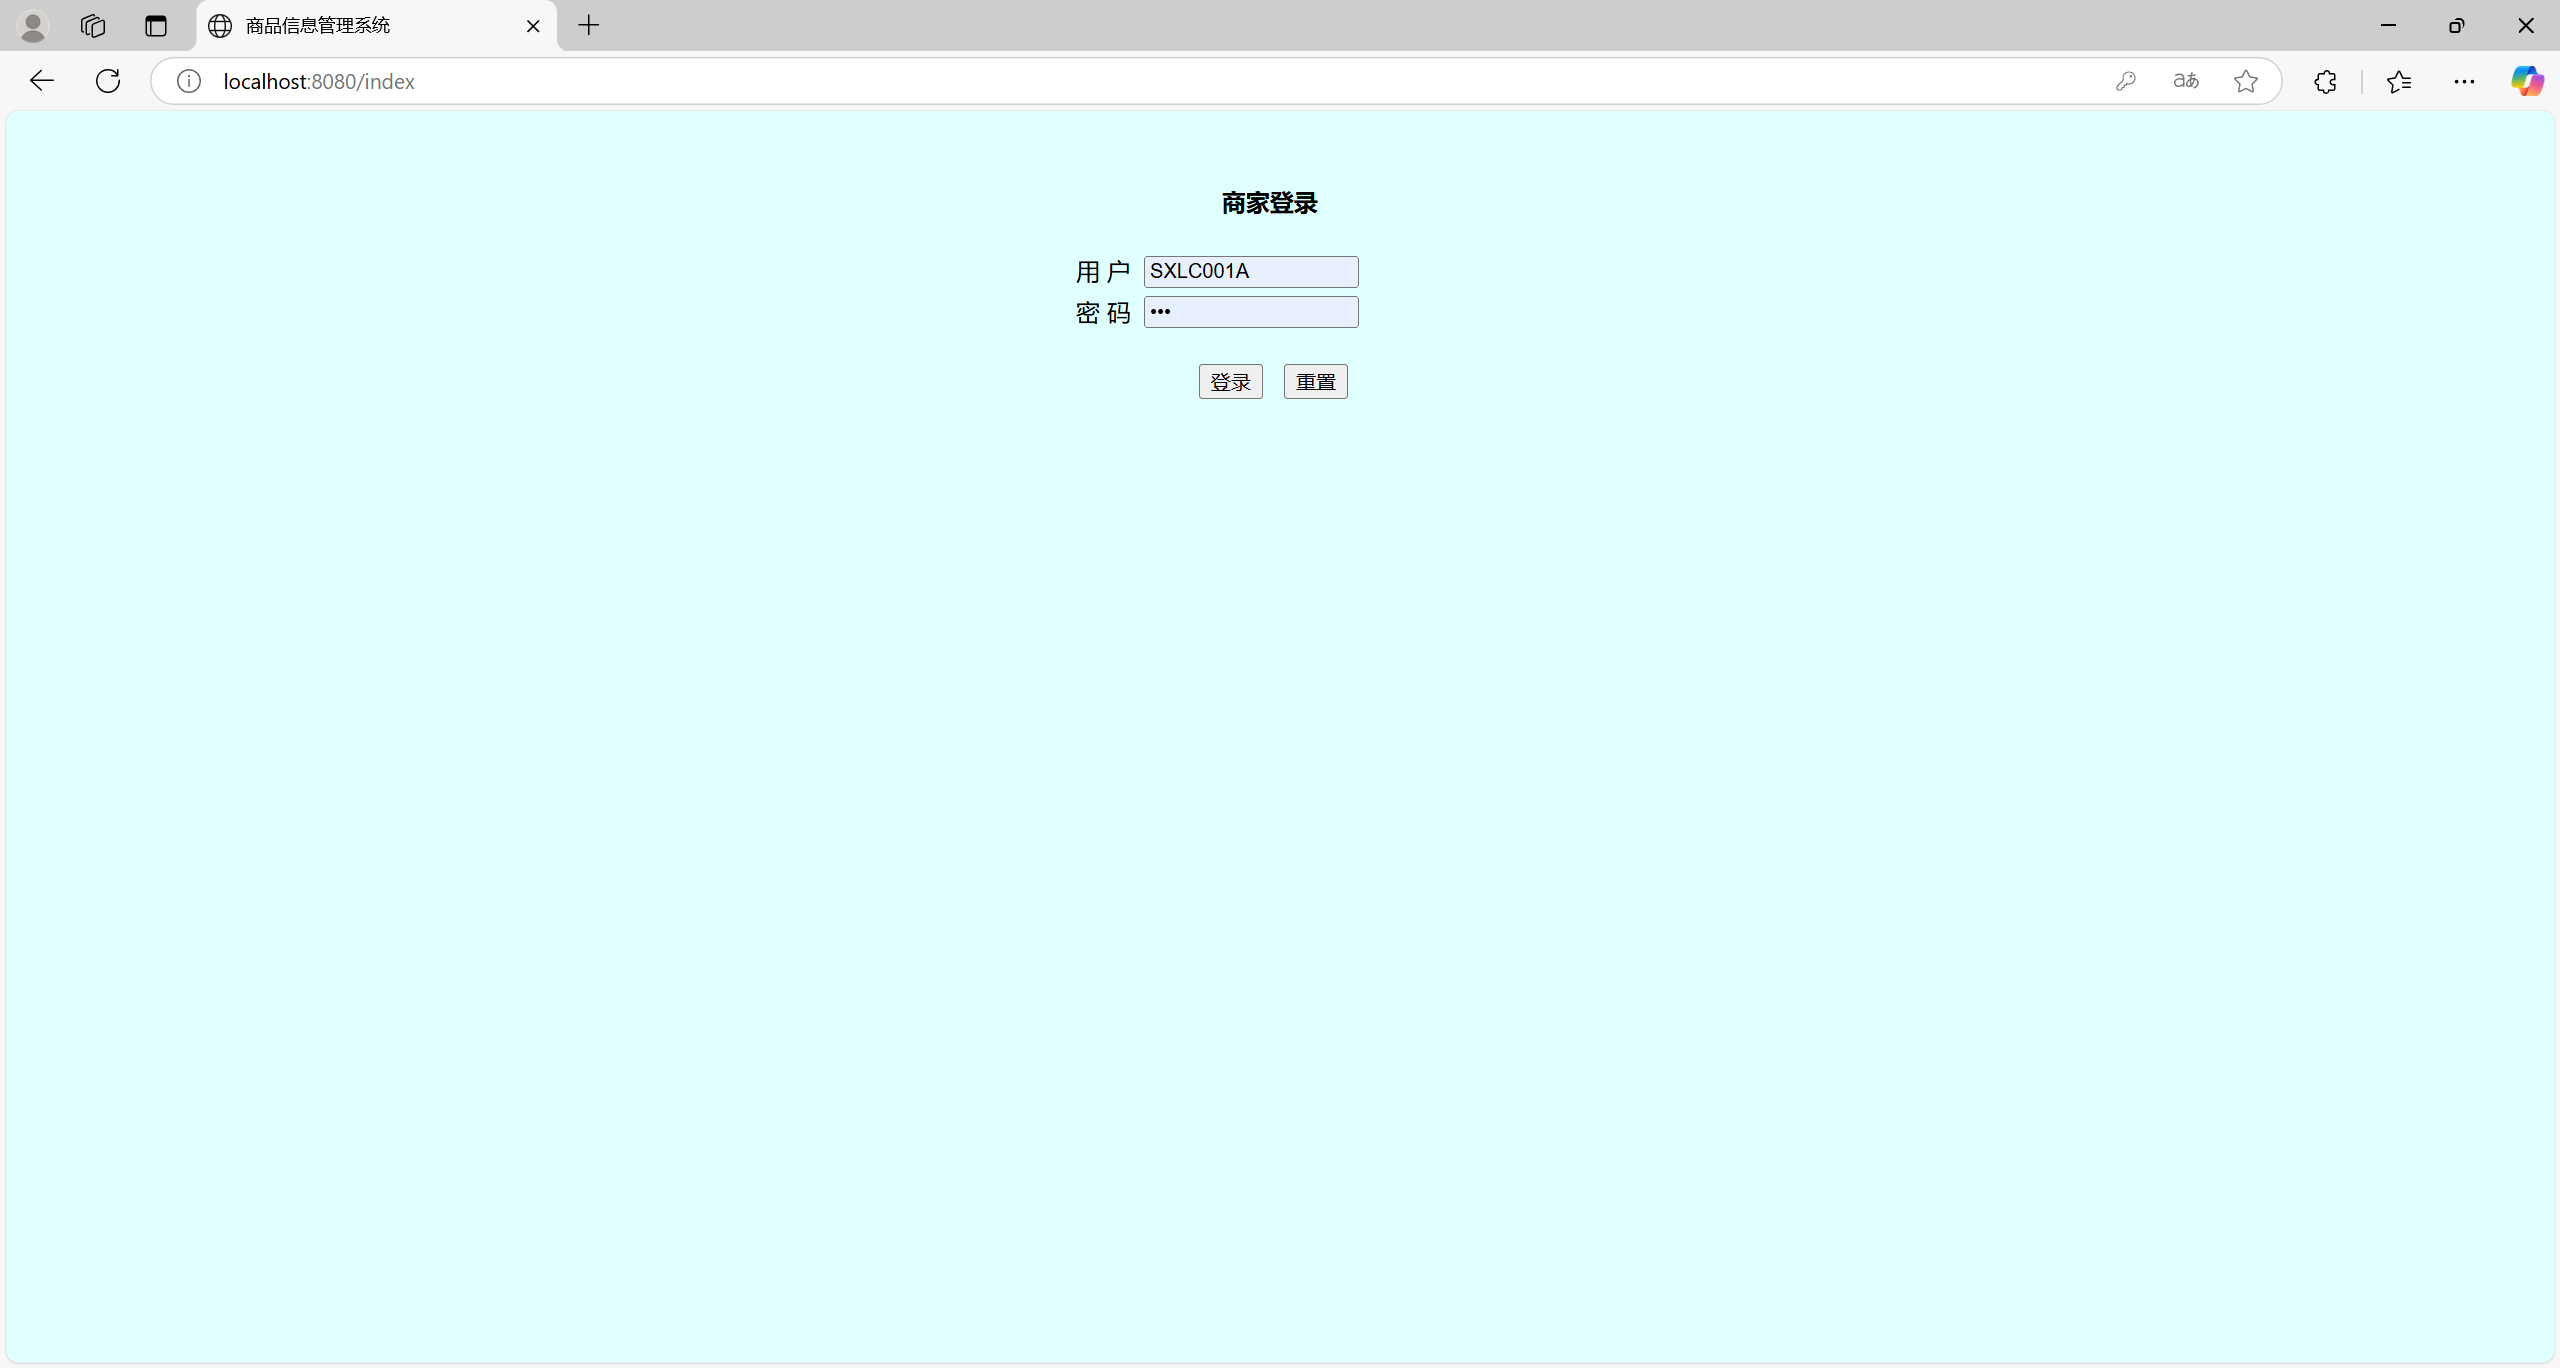
登录成功界面:
本站所有内容仅供学习交流使用,如有侵权请联系wsh1492181519@163.com管理员删除!